

West St Leonards
Behind the Scenes at Bopeep Junction
1991

The name ''Bopeep'' was taken from that of a nearby inn, which in turn acquired the title as a result of local
sheep herding. © Bob Fairman
Summer 2011
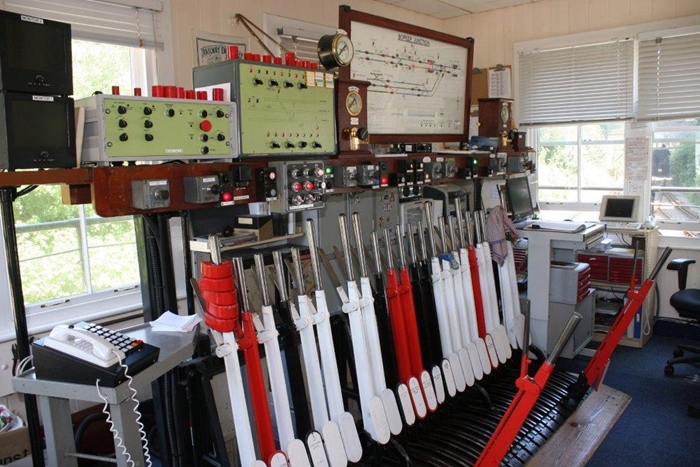
The signal box comprises a 24-lever frame, fourteen of which are spare (white), four which control points (black),
and six which control ''stop'' signals (red). On the shelf above, flanking the track diagram on either side, can be
seen standard Southern Railway three-position block instruments. © Wayne Walsh
Summer 2011
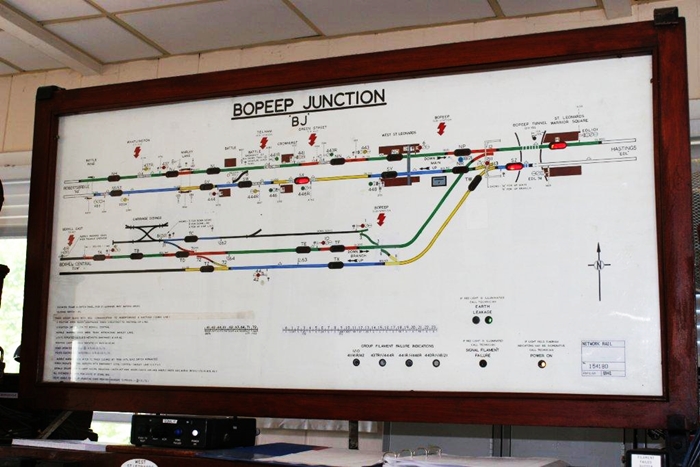
The upper pair of lines in this track diagram are those of the Tunbridge Wells line. On the far right is St Leonards
Warrior Square, followed by Bopeep Tunnel, West St Leonards station, and then Battle. The lower set of lines are
those from Bexhill. The triple-track formation is a result of the additional carriage-washer line and entrance to
St Leonards Depot. © Wayne Walsh
Summer 2011
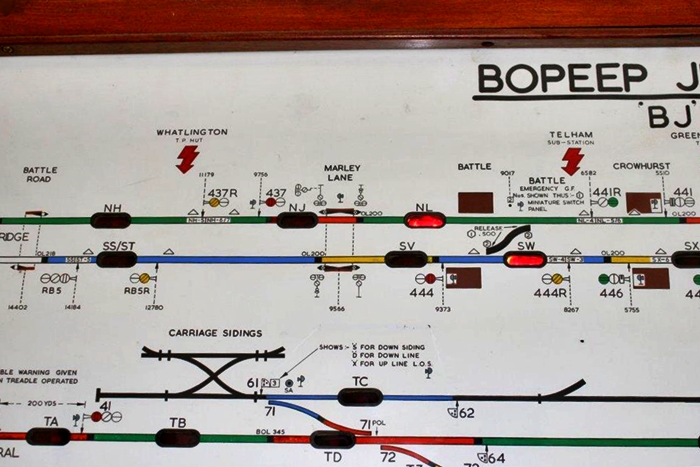
A close-up of part of the track diagram shows, upper left, the fringes of the Robertsbridge Panel's control area.
This is the only surviving intermediate box between Bopeep Junction and Tonbridge. The ''Carriage Sidings''
marked on the diagram are those of St Leonards Depot. An intermediate cabin was retained at Bexhill, albeit
''switched out'' and used to handle ''sandite'' trains (those freights which apply a sand-based mixture to the rails
to improve adhesion). The next signal box along the line is Pevensey, and absolute block signalling is in place
between there and Bopeep Junction. © Wayne Walsh
Return to the Kent Rail Homepage or alternatively, check for Updates.
Website & Copyright information - Links - Contact the Webmaster
All content is copyright © David Glasspool unless otherwise stated