

Strood
One of the final acts of the
SE&CR, just after World War I, was to completely rebuild both platform canopies.
New steel frames were erected and frescoed with the familiar attractive
clover-patterned timber valances; the existing timber offices on the island
platform were retained. Thereafter, it was left to the 1923-formed Southern
Railway to make further improvements. The SR was quick to electrify South East
London suburban lines which, although planned by the SE&CR, finance had not
until this time been available. The first milestone, at least for the North Kent
Line, came on 12th July 1926, when the full electric timetable between the
ex-SER London termini and Dartford came into use. Beyond, steam still reigned
supreme, and engine sheds remained in use at Strood, Gillingham, and Maidstone
West. The 660-volt third rail pushed further east, Gravesend Central being
reached by public electric trains on 6th July 1930.
Finally, on 2nd July 1939, public electric trains were extended to Maidstone and
Gillingham, as part of a £1,750,000 scheme to bring these towns within the third
rail sphere. The lines electrified were:
· Gravesend Central to Maidstone West
· Swanley to Gillingham
· Otford to Maidstone East
Third rail was also laid on the double-track connecting spur between North Kent
and ‘’Chatham’’ lines at Strood. At the latter, re-signalling took place, and
two new cabins were brought into use. These were of the SR ‘’Glasshouse’’
design, of brown-brick construction, and housed mechanical locking frames. The
first of these signal boxes was positioned just south of the tunnel portal,
sandwiched in-between the running lines and engine shed site. Known as ‘’Strood
Tunnel’’, this cabin comprised a 40-lever frame. The second, called ‘’Strood
Junction’’, was constructed within the fork of the diverging Maidstone line and
Gillingham spur, and housed a 70-lever frame. The layout was track circuited
throughout and signals and points (bar the goods yard) were worked
electronically. To accommodate the Junction cabin, those sidings which were
remnants of the ‘’Toomer Loop’’ were lifted. The new signalling came into use on
29th January 1939, and allowed the timber signal box at Rochester Bridge
Junction to close. The latter had controlled the divergence of North Kent and
‘’Chatham’’ lines on the north side of the Medway – this short section of the
ex-LC&DR line was subsequently brought under control of ‘’Strood Junction’’
signal box.
Up until this time, the station had been called ‘’Strood Junction’’, but it
appears the suffix was dropped at the time of electrification. The northern ends
of the station’s platforms were rebuilt and extended in prefabricated concrete
around the curve. Thereafter, the station was used to divide electric services
from London – half of a formation carried onto Maidstone West, whilst the second
portion branched off for the Medway Towns. The pair of sidings which flanked the
‘’down’’ side of the departing Medway Valley Line, south of the platforms, were
electrified. The steam shed at Strood became obsolete and subsequently found a
new life as a ‘’goods store’’. The turntable was, naturally, removed, and the
layout simplified to leave just a single-track entering the former shed
building. The continuation of steam haulage beyond Gillingham saw the depot
there survive the 1939 works.
For long, the freight interest in the Medway Towns was considerable, with large
goods yards at both Strood and Rochester, not to mention the operation at
Chatham Dockyard. For Strood, rationalisation of these lines started with the
closure of Strood Dock on 1st November 1962. The lines around the basin remained
in situ until around 1969/1970, when those tracks east of it were cleared. The
extensive sidings sandwiched in-between the basin and station remained in use
for general goods traffic until 16th August 1971. Beyond this date, most of the
yard was leased by William Cory & Sons Ltd, who operated it as a Coal
Concentration Depot. They also handled bulk china clay here for the local paper
industry.
A notable demolition in early 1970 was that of the former engine shed, which had survived in a goods capacity since closure to steam in 1939. It was followed at about the same time by aesthetic changes to the nearby tunnel portal, which received a new brick fascia. Up until then, the curved bore just emerged from the chalk ridge without any surround/façade.
1970
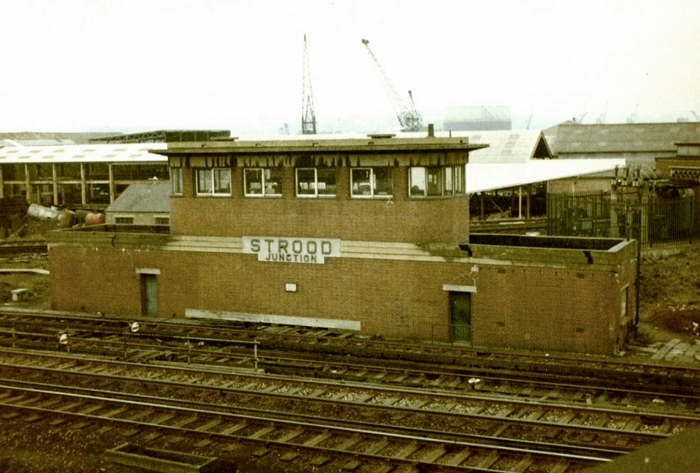
Strood Junction signal box was situated within the triangle between the diverging curve to Rochester and the Medway Valley Line. Sandwiched in-between the cabin and the Medway Valley tracks were a pair of 320-foot-long electrified sidings, hence the four-track layout seen here. © Roger Goodrum
1970
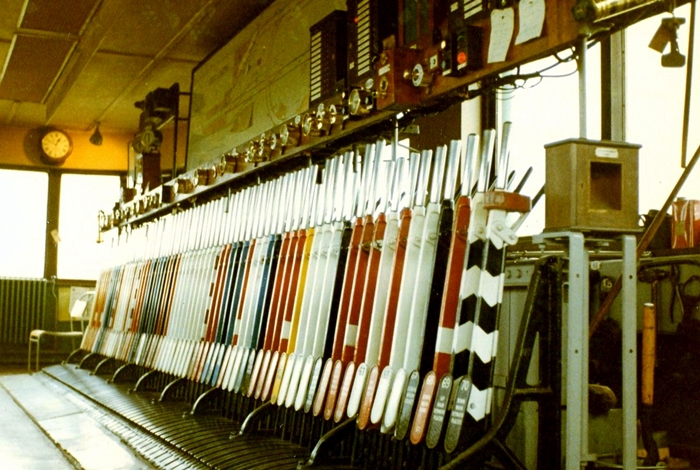
An impressive line-up of seventy levers could once be found inside the Junction cabin. Red levers corresponded to ''stop'' signals, black levers controlled points, white levers were designated ''spare'', and yellow levers were for ''distant'' signals. The signal levers with black and white chevrons operated detonators: the chevrons pointed upwards for the ''up'' line and downwards for the ''down'' line. © Roger Goodrum
1970
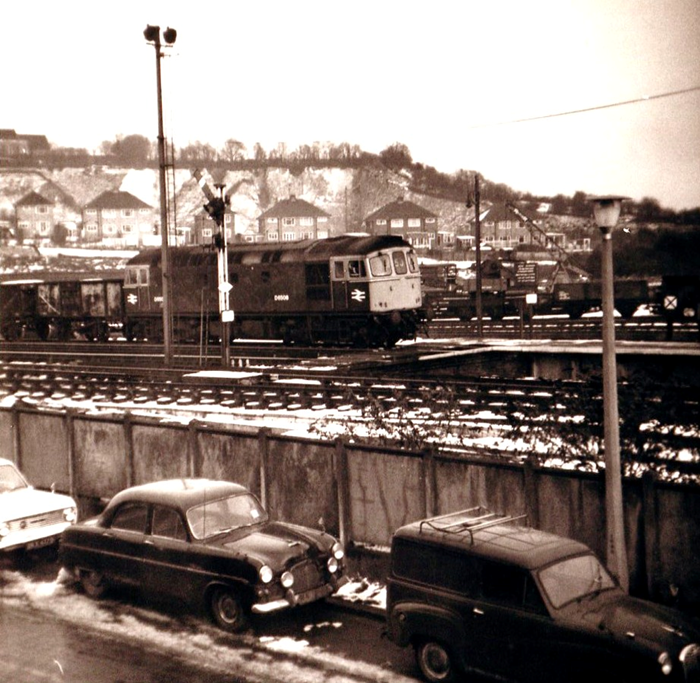
Type 3 diesel No. D6508 (latterly Class 33 No. 33008) pushes back into Strood yard with the daily freight service from Hoo Junction. A splendid array of period cars and a sempahore signal add to this scene, which was taken from the photographer's then bedroom window (a very good spot for watching trains). © Roger Goodrum
<< Previous Next: The History Continues >>
Return to the Kent Rail Homepage or alternatively, check for Updates.
Website & Copyright information - Links - Contact the Webmaster
All content is copyright © David Glasspool unless otherwise stated